October 28, 2011

A Charming Afternoon - Paper Bakery Sketch #1


It feels like it's been a long, long time since I've made something just for fun and not for an assignment so yesterday and today I decided to ignore the things I need to be doing and just make a layout for fun. If felt really good and not I am so ready to get back on task.

For this page, I used a sketch by Grace Tolman for The Paper Bakery. Have you checked out this kit club? Love the stuff they put together and the fact that they have project kits. Good stuff for sure.


Also tried out some new dies and brand new Design Adhesives - can you see it there on the right side? The glitter is so light you can't really make out the design but it's a bird. The flower is made from pattern paper scraps from the Halloween costume patterns.


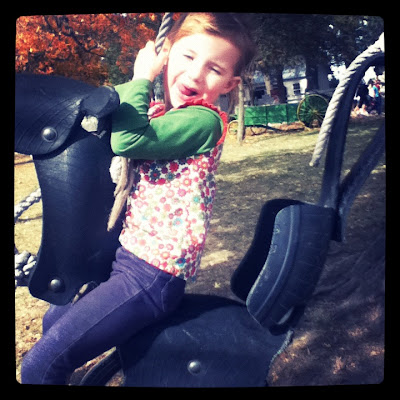
The journaling reads "You become terribly bored on the weekends your bro & sis go to visit their other family, so we stay busy by taking trips to the park to play." Very true. She can hardly stand playing by herself anymore. We often head up to the Martensdale park to ride on the bike trail, swing and play on the equipment.

Also used the sketch to take care of a few leftover paper scraps. Grids just make life easier don't they?


Here's the sketch in case you want to play along too. Have a spooky Halloween weekend! The hubs is taking me to a haunted house tonight - my favorite!

Supplies:
Cardstock - Bazzill, American Crafts
Patterned Paper - My Mind's Eye, Sassafras Lass, Crate Paper, Studio Calico, Echo Park, Basic Grey
Ink: Colorbox Decades Antiquing Ink - Venetian Lace, Colorbox Mix'd Media Inx - Leather
Glitter, Design Adhesives - Clearsnap
Embossing Powder - Top Boss
Stamps - My Mind's Eye, Papertrey Ink
Mist - Maya Road, Studio Calico
Die Cuts - Pebbles, Crate Paper,
Punches, Dies - Martha Stewart, Marcy Uchida, EK Sucess, Spellbinders, PTI
Jewels - Cosmo Cricket
Button - Pebbles
Brads - Basic Grey
Twine - My Mind's Eye, Pink Paislee
Alpha Stickers - October Afternoon
Adhesive - Clearsnap Glue Gloss, TomBow

October 27, 2011

Halloween Costume: Little Mermaid


Yesterday I finished up the final kiddie costume! Saved the hardest one for last since I never did find a pattern that was just right. The green sequin material and netting came from Joann's and the purple is from a thifted wrap top and tank. Pattern was made from measuring her clothes.


We couldn't do the sea shell top because it will just be too cold so I sewed in a tank top covered with a sheer top. It's just disassembled from the wrap top and sewn together in a smaller size. Left an opening on the outside of the sleeves and added in a couple fins there. Ariel doesn't have those, I was told, but she did accept it when the costume was finished.


There are fins on the sleeves and also on the hips. I put a wire stem in each one to help them stand up a little.


And the tail. It was so hard to make this look realistic and easy to walk in. We settled in the middle and added some extra ruffle detail to make up for the lack of authenticity. There is about 2 yards wide of tulle ruffled together to help it poof out. Hmm, maybe I could just sew an extra triangle of fabric in between the fins? That might look much better.


Added a fin in the back as well.


My little gypsy fish. We're off for the first round of trick-or-treating tonight at the zoo. What are you planning to be or will you dress up at all?

October 25, 2011

Halloween Costume: The Black Spiderman


Halloween costume #2 - the black Spiderman. I think maybe he is Spiderman's villainous alter ego but not totally sure. He costume is way cooler and that's all the matters to the young ones.

We made a half mask rather than a full face mask for easier access to candy eating.


The costume is all attached - I just used a pattern for a one piece pajama and added a belt. Still need to stop by the store and pick up some iron on transfer paper so I can add a spider to the chest area.


The back closes with a button. Pretty simple and he really likes it.

Off to do sewing for one final costume....

October 24, 2011

Epiphany Crafts


Good morning! For the next four days the design girls from Clearsnap have teamed up with Ephiphany Crafts for a Halloween Blog Hop combining projects from both companies. My project is up today along with a fantastic-ly spooky card from Mary Dawn so be sure to stop by to check it out - and to win prizes too!

Check it out right here.

October 22, 2011

Halloween Costumes - Pretty, Pretty Princess


First Halloween costume finished. Actually make that two. I've been sewing like a mad woman this last week trying to get all the kids' costumes together and only one left and still a full week ahead of me! Phew.

All the kids have stuck with the same idea for what costume they wanted since summertime, which is quite a feat if you ask me. Leah wanted to be a princess, plain and simple, so we went with a pretty, girly version with sort of a Renaissance feel.


I think the hat really makes it. It was so simple to make with just two triangles of felt, a sheer scarf and a bit of ribbon to keep it on her head.

For the dress, I used Simplicity 2463 and 2460 for the sleeves. Had really wanted to add those long flowy sleeves but there just wasn't enough material in the dress I upcycled.


These sleeves are super cute though. The same one's I used for her 4th birthday dress.


Also added some trim to the middle section to give the look of a corset. Along the front neckline and sleeves I added some pintucked material from a thrifted silk top. And rather than gathering the skirt along the top, I added pleats.


Ooh and the skirt is my favorite part! It was just cut from the bottom of the thrifted dress so no need for hemming or anything! I turned the vent to the front so there would be a mountain of tulle piling out. There is also a large gathering right in the rear so she has a big booty bump like all the gowns in Cinderella. KWIM?

On the inside, I pinned up sections all around and just stitched a little pinch to give it this look that I'm not really sure is called - drapyness? If there is time, I'd be great to go back in and hand sew little flowers or beads at all the pinches. Am crossing my fingers for that.


And the before of the material. It was a pretty Vera Wang bridesmaids dress that I picked up for $1. Tags still attached. A shame really, I almost hated to cut into it, but it was the perfect shade of pale pink.

Check back tomorrow for a peek at the black Spiderman :)

October 20, 2011

7 Delectably Deadly Sins Mini Book


Hey there. Not sure if you had a chance to take a look at my mini book on the Clearsnap blog (you can view it and the video tutorial here), but I thought maybe today was a good day to share the recipes within. It's cooling down quite a bit here and a bit of baking in a warm oven is just the thing to warm up the house.


The background consists of homemade fabric paper, stamped with our Colorbox Queue Cat's Eye Chalk Inks as well as our Rollagraph stamp wheels, Molding Mats and some other stamps too. I then added a little Smooch Spritz and pinned the photo and recipe to the page with a mini clothes pin for easy removal when cooking. The whole book is 3" x 4" and 1 1/2" thick, so pretty small and easy to store.


SLOTH: Lazy Day Cake
LUST: Aphroditie's Chocolate Croissants (I made this one up but its easy - spread nutella and honey on refrigerated croissants, roll up and bake for time listed on package - yum!!)
GREED: Devil's Food Cookies
ENVY: Green-Eyed Susans
GLUTTONY: Drunken Peach & Cherry Crisp
WRATH: Black Magic Cake
PRIDE: Bombshell Brownies

Clearsnap Supplies
Colorbox Cat's Eye Fluid Chalk Queue - Rose Petals, Misty Meadow, Chocolate & Blueberries
Smooch Spritz - Evergreen, Cashmere, Ice Rink, Candle Glow, Hollyberries, Log Cabin, Black Velvet
Molding Mat - Spots
Jumbo Rollagraph Stamp Wheel - Doodle, Wordwords, Butterfly Garden

Other Supplies
Stamps - Hero Arts, Prima Marketing, Kaiserkraft
Cardstock - Bazzill Basics
Patterned Paper - My Mind's Eye
Foam Alpha Stickers - American Crafts
Utility fabric, cut to 12" x 12"
Iron-on Adhesive - HeatnBond by Therm-o-web
Iron
Fabric chalk
Ruler
Pinking Shears - Fiskars
Sanding Block - Making Memories
Crop O Dile - We R Memory Keepers
XL Grommets
1 1/2" binding ring - 7 Gypsies
Epiphany Crafts Shape Studio and Bubble Caps - Stars
Mini clothespins - Darice
Heat Gun - Darice
Ribbon and thread scraps

Happy Thursday!

October 18, 2011

In A Pinch: Gift Wrap


So we had several birthday parties to attend last weekend and amid all the gift choosing and outfit decisions, I completely forgot to buy any sort of gift wrap. Thankfully all the inspiring ways I've been seeing to wrap gifts online lately and my ever expanding craft stash had me covered.

I added a topper to pretty up this plain dress box. It matches what's inside too :)


And here I used patterned paper to wrap a box and also to make some small boxes to hold the pretty treasures inside.

There was one more, but we were in such a hurry I forgot to take a photo!

Lots of fun to pretty up packages. More fun to give and receive.

October 15, 2011

Frightful & Delightful - Colorbox Color Challenge #6

Good morning! I can hardly believe the month is halfway over but today is the 15th and also the start of a new "Out of the Colorbox" Color Challenge at Clearsnap. This month's color scheme was created by Jean Okimoto and is perfect for inspiring those fall and Halloween related cards!


October's challenge features the colors Picante, Chestnut and Pistachio Colorbox Pigment Ink Pads. I ended up using similar colors from the Stephanie Barnard line of Dye Inks to complete my project - Clearsnap inks are preferred but not required so use what you have on hand!

Here's a look at the card I created...


You have until November 14th to create something for this challenge - please visit the Clearsnap blog to link up your project and for the full details on winning the prize!

Colorbox Premium Dye Inks by Stephanie Barnard - Chocolate, Artichoke, Tangerine
Colorbox Decades Antiquing Dye Ink - Venetian Lace
Rollagraph Handle and Wheel - Blocks of Nature
Smooch Spritz - Log Cabin
Clearsnap Glitter - Peridot
Stylus Starter Set
Glue Gloss

Other Supplies:
Stamps - Hero Arts, Pink Paislee
Cardstock - Bazzill Basics
Jewels - Making Memories
Decorative Scissors - Fiskars

October 14, 2011

Mums the Word

Last week we visited the Howell Pumpkin Patch for the very first time. It was beautiful and so much fun - sure to be a new tradition. (photo overload ahead)


October 13, 2011

Bob the Builder Invites


Just popping in to share some Bob the Builder invites I put together for a friend's son's upcoming 4th birthday. Was a little stumped for these but thought some 'Party' caution tape would draw it all together.

Supplies
Cardstock - Bazzill Basics
Patterned Paper - Basic Grey, Crate Paper, Glitz
Stamps - Hero Arts, Pink Paislee
Ink - Colorbox Dye Ink in Wicked Black
Sticker - Cosmo Cricket
Punch - Marvy Urchida
Die Cut System - Sizzix

We have 3 birthday parties to attend this weekend, not sure how we'll ever survive it!

October 12, 2011

Olivia's Party Dress


Last month a sweet girl I know emailed to ask if I could create a special dress for her little sweetie's 2nd birthday. The theme is Olivia the Pig so she wanted black/red and white and something classic but simple. She sent me a photo of a Jenni Bowlin paper pack she was using for the invitations and luckily I tracked down a print very similar in this etsy shop.


(Hope you don't mind her modeling this M. It was just for a few minutes and the dress just looks so much prettier on a person than a hanger :))

This was seriously the most gorgeous fabric I've ever worked with! It's a cotton/rayon blend and is the perfect sturdy weight. Easy to sew + beautiful! The pattern is a combination of Simplicity 2767 and the bodice from Simplicity 2460 and a few of my own additions.


The red material is this luscious stretch satin I found at Joann's. It is on the cuffs, neckline and sash and also the lining so it feels pretty on her skin. The lining is shorter so the hem pulls up to make a bubble shape. There is a little tulle sewn in there as well for extra poof. The wrists are elastic so she can pull them up when it's time for cake.


The best part of course being the backside! I skipped the zipper and instead added in a keyhole and button closure for a bit of elegance. The sash also buttons so she can wear it with or without.


And to pay homage to Olivia, we had to have the oversized red bow. So glad I could help to make a little girl's birthday extra special again this year!